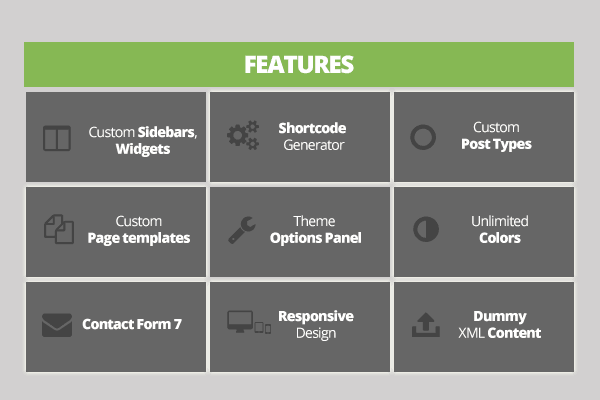
It’s no wonder that more and more users are making their mind for WordPress when starting a blog or a business site. WordPress has some amazing features which will help you create the site you want and manage it easily.
Whatever your web content is about, you will be able to get the most of it by using advanced and easily manageable features, which are all accessible right on your Dashboard. The only thing you need to do is to create an account and choose the WordPress package that suits you the best, choosing from Basic, Premium and Business profile.
Simple to use
WordPress is extremely easy to use and manage, as you can just in few clicks operate your entire site and publish your content, setup templates, widgets, upload media, view stats and watch your business grows along with your site.
Flexible
No matter what your site or blog is about, with WordPress you can make any content functional and easily operate it. You can start a photoblog, personal blog, business site, magazine and news websites, network websites and even online community websites. All WordPress features can help you easily create any type of site or blog you want.
Publish and Post
You can easily create any page or a blog post, where you can add categories, tags, upload media and even schedule your posts to be published any time you want. If you know how to create a regular word file, you will definitely be able to post and create new pages and posts.
Comments
Comments are a great way of having an insight on which content is the most popular on your site and whether is accepted or not. All visitors can start a forum discussion, and you get to decide which comments are allowed and which should be trashed or marked as spam.
Search Engine Optimization
WordPress platform is categorized as safe to use by Google spam control, so you can be sure your traffic can be boosted and visits easily increased while using WordPress for your site or blog. WordPress has taken care of most aspects, and for more sophisticated and advanced optimization, you can use available variety of SEO plugins.
Multi Language option
Options could be on English, but if you prefer to have your blog or site managed in some other language, WordPress is available in more than 70 languages, so you can easily chose another language if you want.
Complete data ownership
Choosing WordPress to be your web spot means you are choosing a complete ownership over your data, content and site. No one will be able to access your data, dashboard or content, unless you allow it.
Great Templates
There are over 200 different templates with various designs, from which you can choose the one that suits your site or blog. Every template is fully functional and made to look great on any device and computer.
WordPress also offers possibilities to change and add the things you think are missing, you can join community and share your knowledge and opinion about WordPress, use plugins, widgets and more.
WordPress is extremely easy to use, so if you already signed up, chose your name and password, and decided on whether you need Basic, Premium or Business plan, you can continue with WordPress training until you are set and ready to take it on by yourself.
Here are the next steps to help you learn how to easily manage your WordPress site or blog. You are just few steps away from mastering this great CMS platform, for soon you will be able to run it without any problems.
Setting up your public profile
Your profile is very important, just as your blog or site is, because every time you post a comment or provide a feedback to your visitors, your profile name will be displayed. You are in fact, at the same time, joining the community, so in order to be a legitimate part of it, you can adjust and set up your public profile.
This won’t last longer than couple of minutes, since all information is optional, and you are not required to enter everything about yourself, just the things you think are important for your visitors to know. Information you enter will be visible at just one click, for every visitor.
You can choose your profile name to be your legal name, and type in your basic info, but you can also just use a nickname and write something about your business, expertise, etc.
Customize your profile
You can set up your profile by entering Users>>>My Profile, which are placed on your dashboard. You also use dashboard to fully operate your site, and use plug-ins, post blogs, choose templates, create pages, site map, etc. – everything regarding your site or blog.
Now, when you have your public profile set, you can join the community and let your visitors get to know you better.
Configuration of basics
This is where you supposed to set up your site’s name and tagline, which is actually one of the crucial parts, for that is how your site name will be displayed. You just need to go on Settings>>>General. If you don’t want any tagline, you can just erase the existing sample text.
Here, you can also set the time zone, date and time format. When you are all set and done, you can move on to site managing, and get your site visible to all of your potential readers.
Mastering Your Dashboard – The Home Page
Dashboard is the main place of all events and set ups of your site. You can read, arrange, delete and approve comments, post blog posts, make pages, do tags, meta tags, alt-tags, make new categories, upload media files, check out your stats and see who is linking to you. So, you basically have complete control over your blog or site. More importantly, remember to set the URL right and to also include the www Most of the time the www version of the website will not be created if it’s not set properly.
Manage your Dashboard
On the side of the screen there is a menu displayed which allows you to manage every aspect of your site, view WordPress.com news and find your way around your site. You are in complete control over your blog or site you are running, so get ready for the next steps, which will help you master your dashboard in no time!
This article will help you to get a clear idea about your dashboard. Dashboard is kind of like the outline of a WordPress site. So you should follow the tips given in this article to get a hang of it.
WordPress is one of the most popular and more frequently used Content Management Systems worldwide, mostly because it is pretty simple to use it and manage it further, as your site or blog develops. It is very easy once you get started, but first you need to learn some basics, so you would be able to manage and maintain your blog or site.
Choose your password and username
Username you choose is not as important as you might think. Your site or blog won’t be named by your username, so you can use any word/words as your username. Below the username field, you will find a field for entering your password.
Get a strong password
Your password, however, is very important, so you could make sure that only you could manage and maintain your site. Password should be unique and tricky, containing characters and numbers, preferably switching from Capital to regular letters.
What to avoid when choosing your password
You should avoid making your name a password, for it may be obvious and easily cracked. You can for example make your password to be something like: “DoN’t1ToUcH2My3PaSs”. By using capitals, characters and numbers combined, chances that your password remains secret are fairly increased.
When signing up on WordPress, you can click on “show” button, to make sure you typed it correctly and avoid retyping.
Picking your Web address
When registering on WordPress, you can choose your address to be free, or you can as well purchase it. The differences are present, of course, considering the fact that when you choose your site to be free, which I available for every user, your web address would look like this: http://mywebsite.wordpress.com.
Paid WordPress hosting Web address
In case you choose to pay for your web address, your address would be: http://mywebsite.com, which most people prefer when starting a business. And in fact, if you are in fact running a business, it would be the best if you choose to pay for your domain, instead of getting a free web address. If you are running a private blog, both solutions can apply.
Web address opportunities
Besides .com extension, you can also add .net, .org or any other, but have in mind that prices vary from one to another domain name. When choosing your web address name, make sure that the name you have chosen is directly related to your company, describing your business in a relevant way.
Choosing the WordPress Plan
You can choose between Basic, Premium and Business plan which are different in options, features and vary in prices. Basic is, of course, free, so if you are still not sure which plan would suit you the best, you can always stick to a free solution until you decide what you want from your site.
A WordPress plan to meet your needs
Basic plan also has all basic WordPress features, just as Premium and Business plans, including great themes, friendly customer support and unlimited bandwidth, so you can create your own customized website or blog for free and stick to it using great number of amenities, and if you decide, you can always switch to Premium or Business plan at very affordable prices.
So in this article we have tried to give some of the fundamental knowledge of the WordPress so that you can easily start your own. Having a strong password and appropriate web address are just as important as any other WordPress basics. So let’s begin.
The way your business is branded counts at your visitor and potential customers, so you need to find a way to make your site more visible and have your brand established. WordPress is helping individuals, companies and business owners since 2003. to establish their brand the best way possible and showcase their business in appropriate manner. WordPress has many qualities which contribute to easily established branding and recognizable company ownership, which makes owning WordPress a great business move.
WordPress Personality
WordPress has developed a great way of having your site personalized and easily customizable, so you could adjust your web pages to fit your business needs. You can at very affordable prices, or for free, pick any WordPress package between Basic, which is free, Professional or Business package, and start working on your business site.
Every aspect of WordPress is easily manageable and simple to set up, so anyone could easily do it. One of the crucial factors for establishing your brand is getting your site personalized, which you can easily do by managing your content, uploading media, manipulating tags and creating great site name and tagline, which should capture the visitors’ attention and keep them engaged and returning.
WordPress Original Design
WordPress offers you more than 200 differently designed templates from which you can simply choose the one that suits your vision, by simply going to the Dashboard Appearance option, choosing Templates. WordPress professional designer team has developed a great variety of templates with personalized design, so you can advertise your brand originally and at affordable prices.
No matter what your business is about, you will be able to adjust your brand appearance, color scheme, your company’s logo and tagline, all in jut few minutes and all by yourself. WordPress templates are made and designed to help you showcase your business the way you want it and made that process easier, by making all options and functions extremely simple and easily manageable. You can have your business site set and ready to go in minutes, all in original WordPress design and with wide choice of unique and completely functional templates.
WordPress Blog Posts
Blog posts are basically the best indicator of your activity, which will certainly help you establish your company’s brand mane with WordPress. WordPress blog post options are set up to help you with your site visibility and are set to help you boost trafficking towards your site. In order to get the most out of WordPress blog posts, you should be active and post every day for at least one time, i.e. one post.
Posts are extremely easy to edit, create, publish and trash the posts you don’t need or like, and you can even schedule the publishing and release the post on specific date and time. You can add tags, meta-tags, upload media and do alt-tags to uploaded images on your site. All of these options are meant to help you increase the number of visitors you are having on daily basis, going towards establishing your business brand with WordPress, all easy and simple.
Having a hard time figuring out all the tricks of WordPress posting. Well you don’t need to look farther. Because I’m going to give you some quick and easy steps which you can remember and apply to get your WordPress posting up and running. Soon, you will experience an elusive “Ah-ha!” moment.
1. Schedule Blog Posts for the Future
It’s important to have a scheduled posting time like once a month, once a week or once a day. But that doesn’t mean you need to be in front of your computer when the post goes live. You can just schedule it. Here’s how.
In the WordPress backend, go to the Edit screen for the post you wish to schedule.
ü In the top-right of the page, look for a box titled “Publish,” where you’ll find an option that says “Publish immediately.”
ü Click the blue “Edit” text next to “Publish immediately” and select the month, date, year and time you want your post to be published. Remember to use military time (3:00 p.m. would be 15:00).
ü Click the gray “OK” button. The “Publish immediately” text should now change to “Schedule for,” with whatever date and time you have chosen.
ü If you’re ready to go, click the blue “Schedule” button (formerly “Publish”). Your post is set to go.
2. Change Your Page and Blog Post URLs
WordPress usually takes care of the trouble of creating URLs for your pages or posts. In some cases you need to adjust and here’s why:
-
Your page or post URL contains special characters like %, &, $, @, or *. These characters make it difficult for search engines to read and can be problematic for browsers, potentially preventing some of your pages from loading.
-
Your post or page title is really long and contains words not optimized for search.Search engines prefer shorter URLs, so it’s worth removing words that won’t help the posts or page’s ranking.
If you happen to face any of the situation listed above, here’s how to change it:
ü In the WordPress backend, go to the Edit screen for the post or page you wish to edit.
ü Just below the title, click the gray “Edit” button next to the permalink. If instead of “Edit,” you see a button that says “Change Permalinks,” Click that button and click the “Post name” radio button on the “Permalink Settings” page. Then click the blue “Save Changes” button. Go back to the post or page you wish to edit and you should see the “Edit” button.
ü When you click “Edit,” the URL will change to a text box, ready for you to alter. Remove special characters and any words that could hurt your search engine rankings. Make sure you also separate each word with a dash (-).
ü Click the gray “OK” button.
ü Click the blue “Publish” or “Update” button to save your changes.
3. WordPress Editor Tips
Even though you have managed to post a blog, chances are, you haven’t realized its full potential yet. Here’s some WordPress tool you to speed up your workflow and eliminate misspellings and website styling issues.
vSpellcheck in the WordPress Editor
vRemove Formatting from Copied Text
vShift + Return Creates a Line Break
vUse WordPress Keyboard Shortcuts
For a full list of WordPress “Hotkeys,” click the “Help” button with the question mark on the WordPress editor, then click the “Hotkeys” tab.
4. Easily Embed Videos, Tweets and Other Media
You can easily embed content from popular websites likeYouTube, Vimeo, Twitter, Hulu, Flickr and Viddler. Here’s how.
ü Put your cursor wherever you want to insert the media.
ü Go to the media’s source site and copy the URL for the media you’d like to insert.
ü Now go back to the WordPress editor and paste the URL into the main content area of the page.
ü If the URL you pasted appears in the main content area of the editor as a blue link, you need to unlink it. Click within the URL text, then click the broken link icon at the top of the main content area. The text should unlink.
ü Click the gray “Preview Changes” button on the top-right of the page to make sure the media has embedded correctly. You’ll see the YouTube video we embedded now displays within our content.
5. Change Blog Post Authors Simply
With WordPress, you can easily change authors for your posts. Here’s how:
ü Go to the Edit screen for the blog post that need an author change.
ü In the top-right of the page, click the “Screen Options” tab and a list of options will drop down.
ü Check the box that says “Author.” A new box on the page should display, titled “Author” and containing a drop-down box to choose the author of the post.
ü Click the blue “Publish” or “Update” button to save the post under the new author.
If you follow these basic steps at the beginning, you will soon find more advanced options to create your own style of posting.
There are 5 different types of redirects you need to know about: 301, 302, 303, 307, and 308 redirects.
In this guide, we’ll explain what each redirect translates to and when to use 301 redirect and other redirects:
1. 301 Permanent Redirect (permanent redirect) –
What does this redirect mean? The link you are trying to visit isn’t here anymore. The URL has moved to a new address.
In theory, the server is trying to tell that the files (web page or blog post) at the address have moved to somewhere else permanently. This status usually tells the site owner that old address must be deleted and replaced with the new address.
When to use 301 redirects?
-
If you are going to delete a page, you can use the 301 redirect to forward visitors to the next location.
-
If you decide to make one version of the same page (often squeeze page) unavailable in favor of another, you can 301 the former.
2. 302 redirect (temporary redirect) –
A 302 redirect usually translates into: a certain page, a URL address, was here but is unavailable for a moment. So, the visitor has to find the page in the next temporary address or wait for a while until it is available at its original location.
Although 302 redirects were originally meant for different use, many browsers didn’t pay attention to that.
As a result, a new code, 303, was created.
When should you use 302 redirect?
Well, you really don’t have to. If you really need to use 302 redirect, simply call your SEO consultant, explain them what you want to do, and they will do the job for you.
Likewise, if you’re a web programmer and feel that you want to learn more about the 302 redirect, read about the 303 redirect instead.
3. 303 Redirect –
Basically, this redirect tells a user/visitor NOT to refresh the page like crazy and accidentally re-submit their credit card payments more than a single time. So, the 303 redirect sends you to another place while you hold your credit card resubmit and avoid any confusion.
To prevent bookmarking or refreshing of pages holding one-time only data (think of an online payment form), the server answers back with a 303 redirect, which basically means “Well, we have already received your payment information from the form using the POST method; to avoid data accidents, please check out this other URL bringing your data using the GET method in order to be really clear.”
When should you use 303 redirect?
To be honest, we really don’t require using this redirect. However, if you’re a programmer, then you may want to check out the theory under 307 redirect!
4. 307 Temporary Redirect –
Like 303 redirect, this redirect prevents you from refreshing the page (like the payment form) multiple times and accidentally end up paying up more than 10 times. It sends you to another URL, temporarily.
When should you use 307 redirects? Again, you and I don’t require it. For programmer, however, learning about 307 could be handy.
5. 308 Permanent Redirect (experimental) –
This redirect translates into: you can perform the same action you did over there, but you don’t necessarily need to change the way you said it.
When would you use it? You guessed it right! This redirect is not for you and me, but probably for web developers.
Which redirects will be important for me?
You only need to concern about two redirects – the 301 and 302 redirects. You require 301 because it is really what you want to use. Plus, you may want to avoid 302 redirects. So, if you see a 302 redirect on your site, you may want to call someone and find out why and do something about it.
Finally, can you check which type of redirect you’re using?
Of course, yes. The server broadcast this information directly on the browser. Although the information isn’t visible on the page as it is meant for the browser, nonetheless, you can use handy tool like “header checker” to make it visible on your pages to learn more about each redirect.
Contact Us
GetYourSiteRank.com
Your Internet Marketing
Consultants 5001 Beach Road
#07-29 Singapore 199588
contact@getyoursiterank.com
Your Internet Marketing
Consultants 5001 Beach Road
#07-29 Singapore 199588
contact@getyoursiterank.com

 Call Us today!